Edit Calendar Events

The following tutorial shows you how to edit Calendar events in your App.
Step 1 |

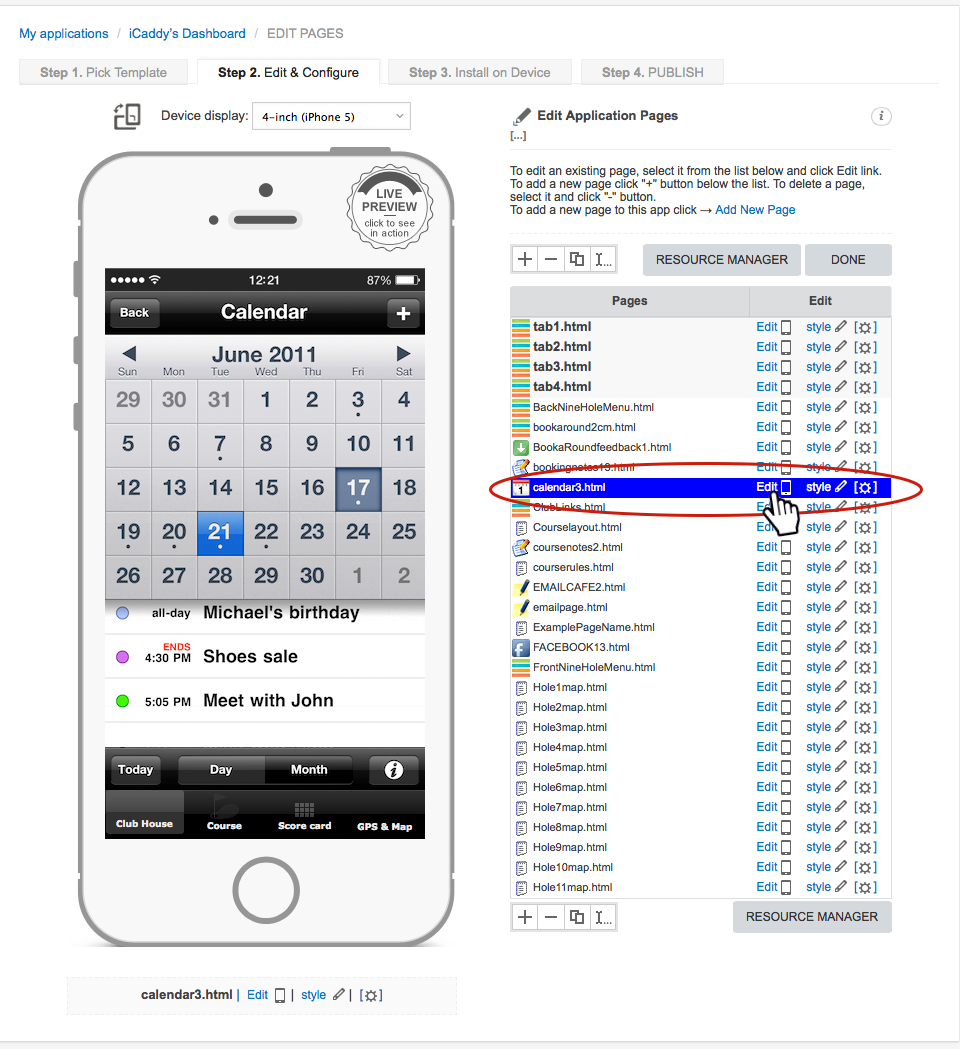
Navigate to the particular page you wish to edit (e.g. My Applications / App Name's Dashboard / EDIT PAGES / calendar3.html shown in the 'Navigation Path' at the top left of 'Step 2' below). For instructions on how to navigate to the individual page edit level, go to How to Start Editing Your App.
|
Step 2 |

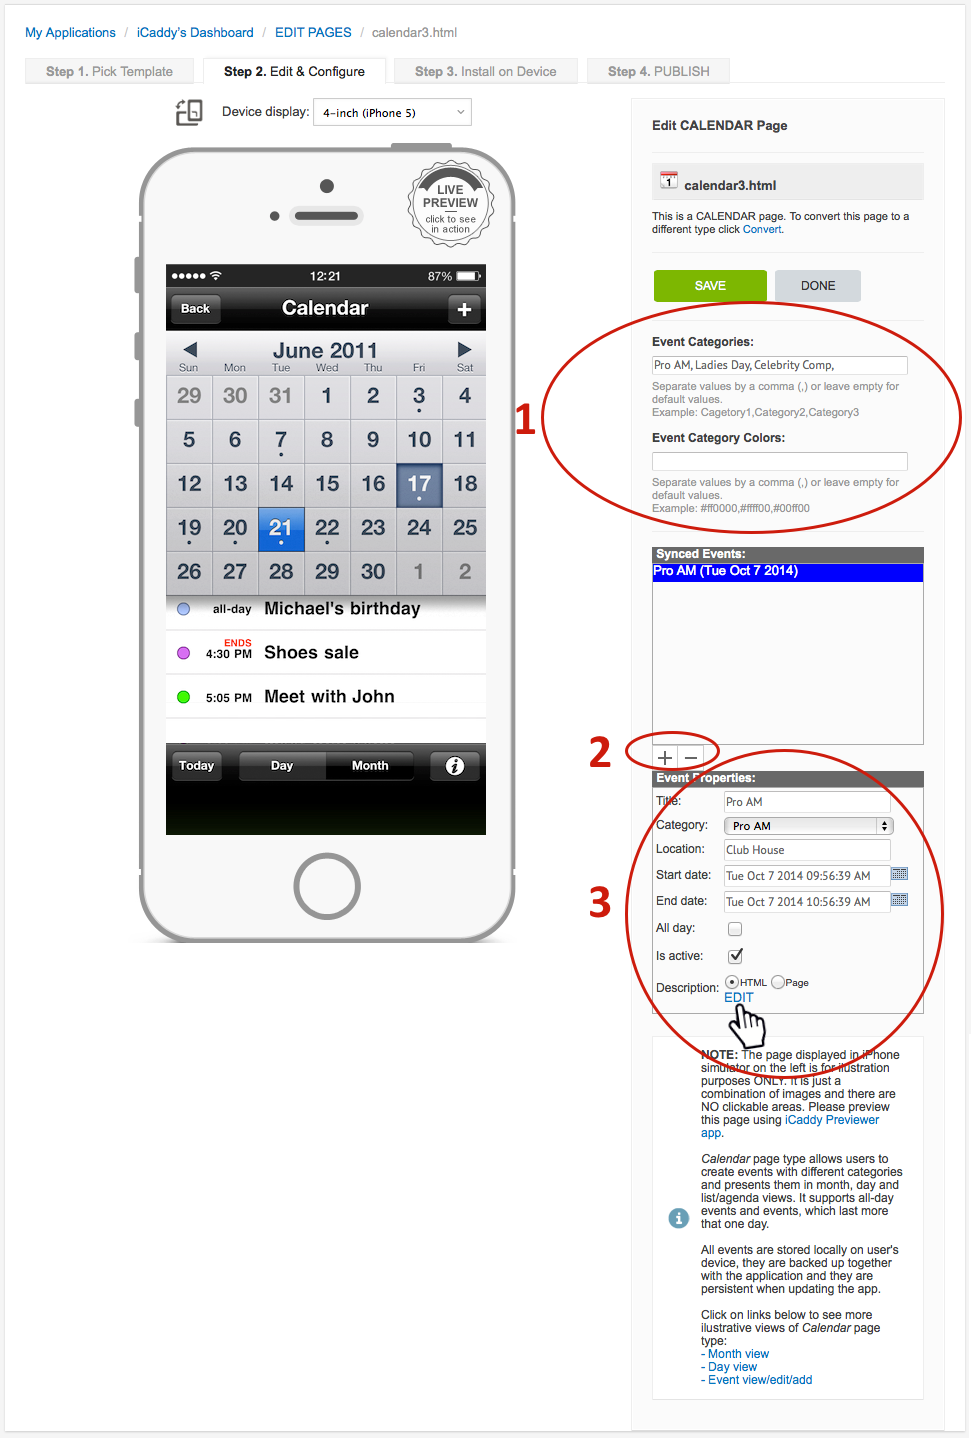
There three steps to setup an event in your calendar.
Step 1 Enter event categories with a comma between each event. You can add a prefered event color by placing the color code also seperated by a comma. Step 2 Click the (+) sybol as shown above to add an event. In this example we have only added one event. Step 3 Once an event is added to the 'Synced Events' list, the 'Event Properties' will display the edit options. The title, category, location, Start-Finish date and times can all be edited or selecting the all day check box to only include days not times. The 'Is Active' check box must be selected for the event to be listed on your App's calendar. The description of the event can be linked to a seperate page by selecting 'Page' at the bottom of the 'Event Properties' box or select the 'EDIT' from the 'HTML' option to add the information as shown below in step 3 below. |
Step 3 |

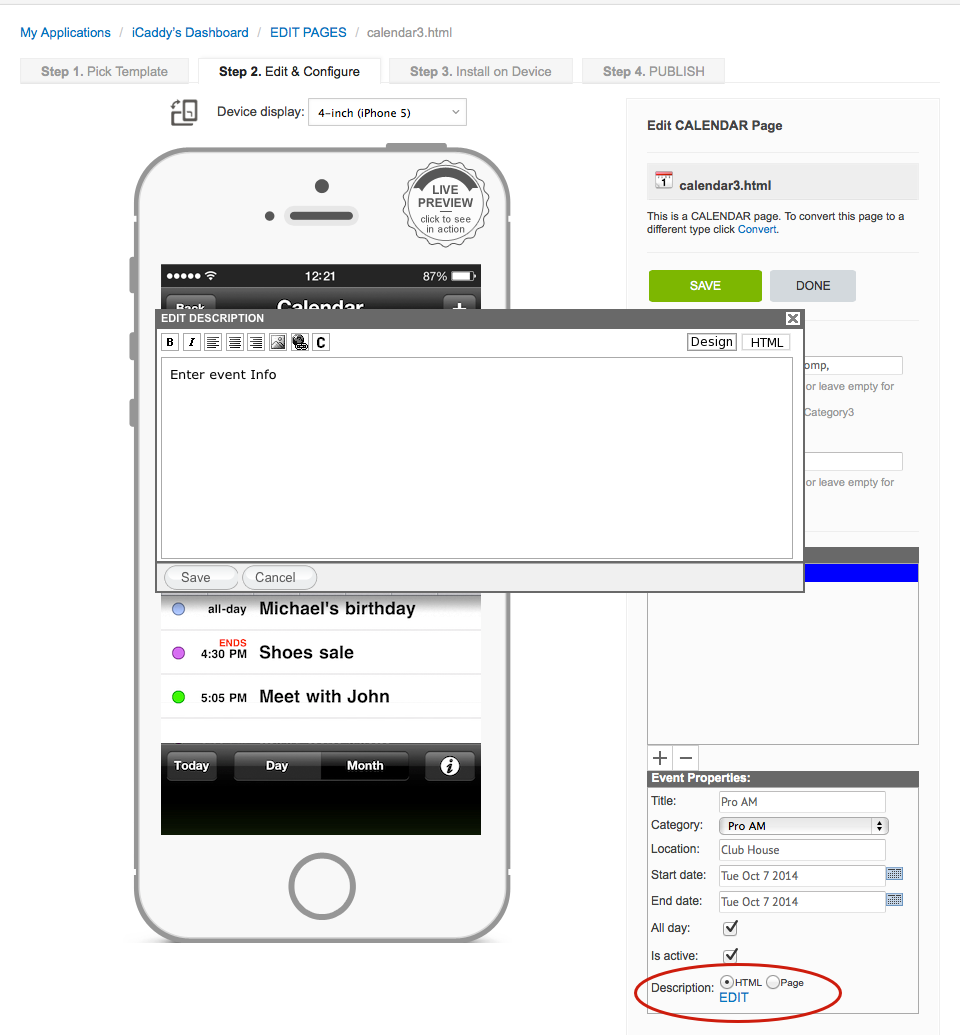
To add a description about the event select 'EDIT' (as show in step 2 above) and the 'EDIT DESCRIPTION' window will open. You can add your information as required and select save.
Note: Your calendar can be checked by using the iCaddy Apps Previewer on your target device (e.g. iPhone or Android). Refer to How to Download the iCaddy Apps Previewer and How to View Your App on the iCaddy Apps Previewer, for further information on how to download and use the iCaddy Previewer App. |
