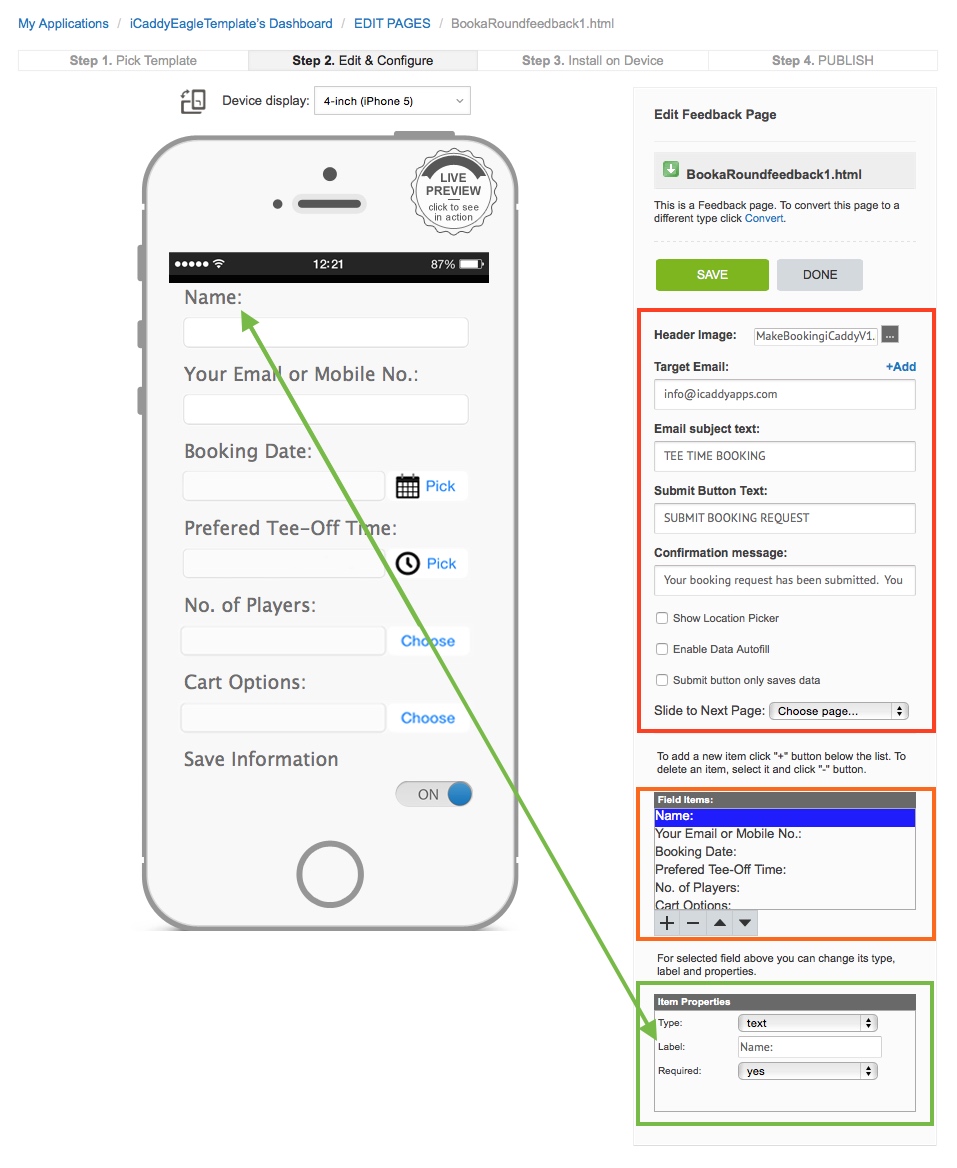
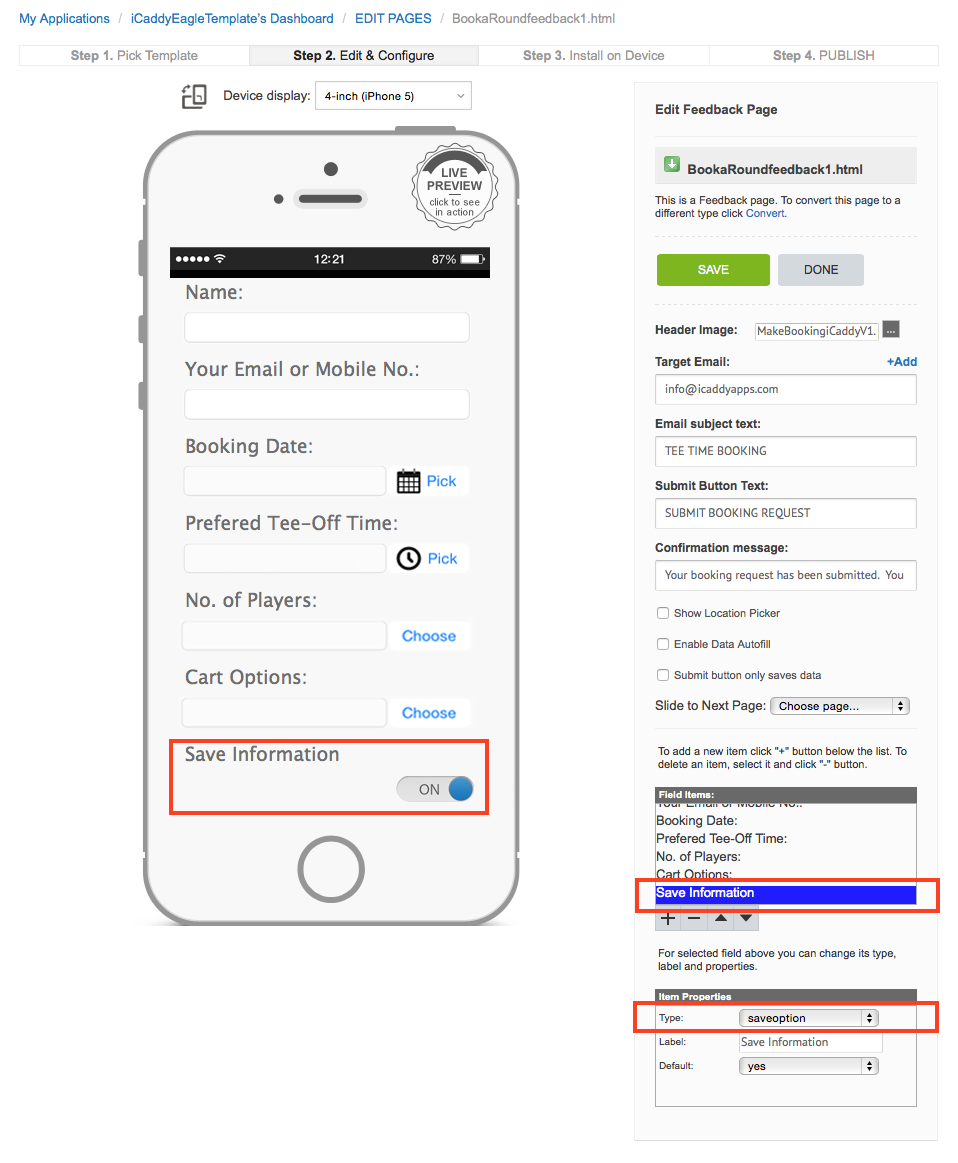
The image above has been split up into different sections (colored boxes) to assist understanding. Each 'box' is described below.
Red Box: The red box contains five (5) fields, three (3) check-boxes and the option to slide the 'Booking Form' page to another page.
Header Image (field): Select your preferred header image as required. The image used on this page is normally your Club's logo. For further information on uploading images into your App, go to
How to Add a File to Your App's 'Resources'.
Target Email (field): Enter the destination email address that you wish bookings to be sent to (e.g. bookings@golfclub.com).
Email Subject Text (field): Enter the text for the 'Subject' line (title) of booking emails. The preferred email subject text will be automatically populated on the booking email (e.g. Tee Time Booking). Edit this text as preferred.
Submit Button Text (field): This field displays the text shown at the bottom of the 'Booking Form'. This text is effectively a
button that submits the booking email to your Club. Edit the text for the 'Submit Button' if required, or leave unchanged.
Confirmation Message (field): The 'Confirmation Message' is automatically displayed on the App-user's device (pop-up image) after tapping the 'Submit Button' (described above). Edit this field as required. Clubs should ensure they confirm each booking via a separate reply email, SMS message or telephone as preferred.
Show Location Picker (check-box): Leave this box un-checked. This function is not applicable for the 'Booking Form'.
Enable Data Autofill (check-box): Checking this box allows data to be auto-filled when completing the 'Booking Form'. Note that not all devices support this function.
Submit Button Only Saves Data (check-box): Leave this box un-checked. Checking this box will disable the auto-email function in the 'Booking Form'.
Slide to Next Page: Leave this setting unchanged, unless you wish to allow the App-user to slide from the 'Booking Form' to another page in your App. Enabling this feature is not recommended as users should be encouraged to 'Submit' their booking
before navigating away from the 'Booking Form'.
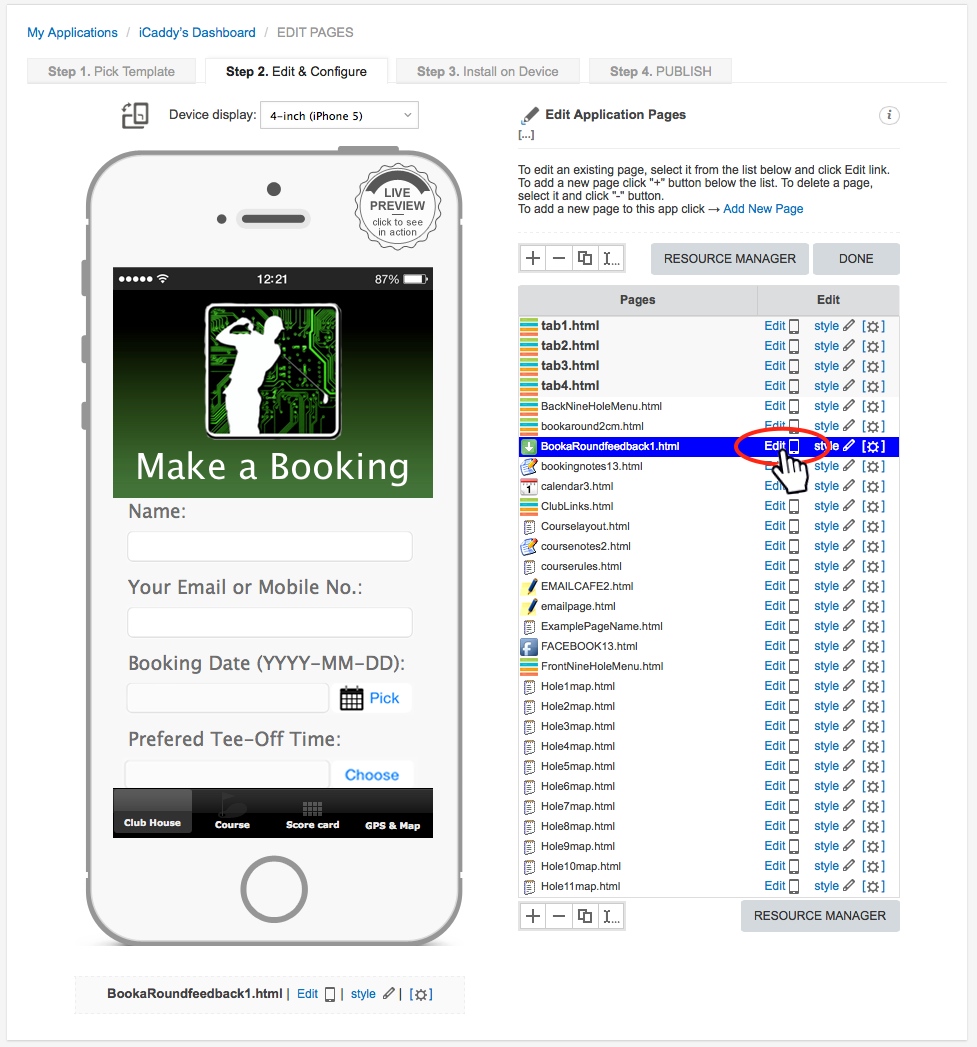
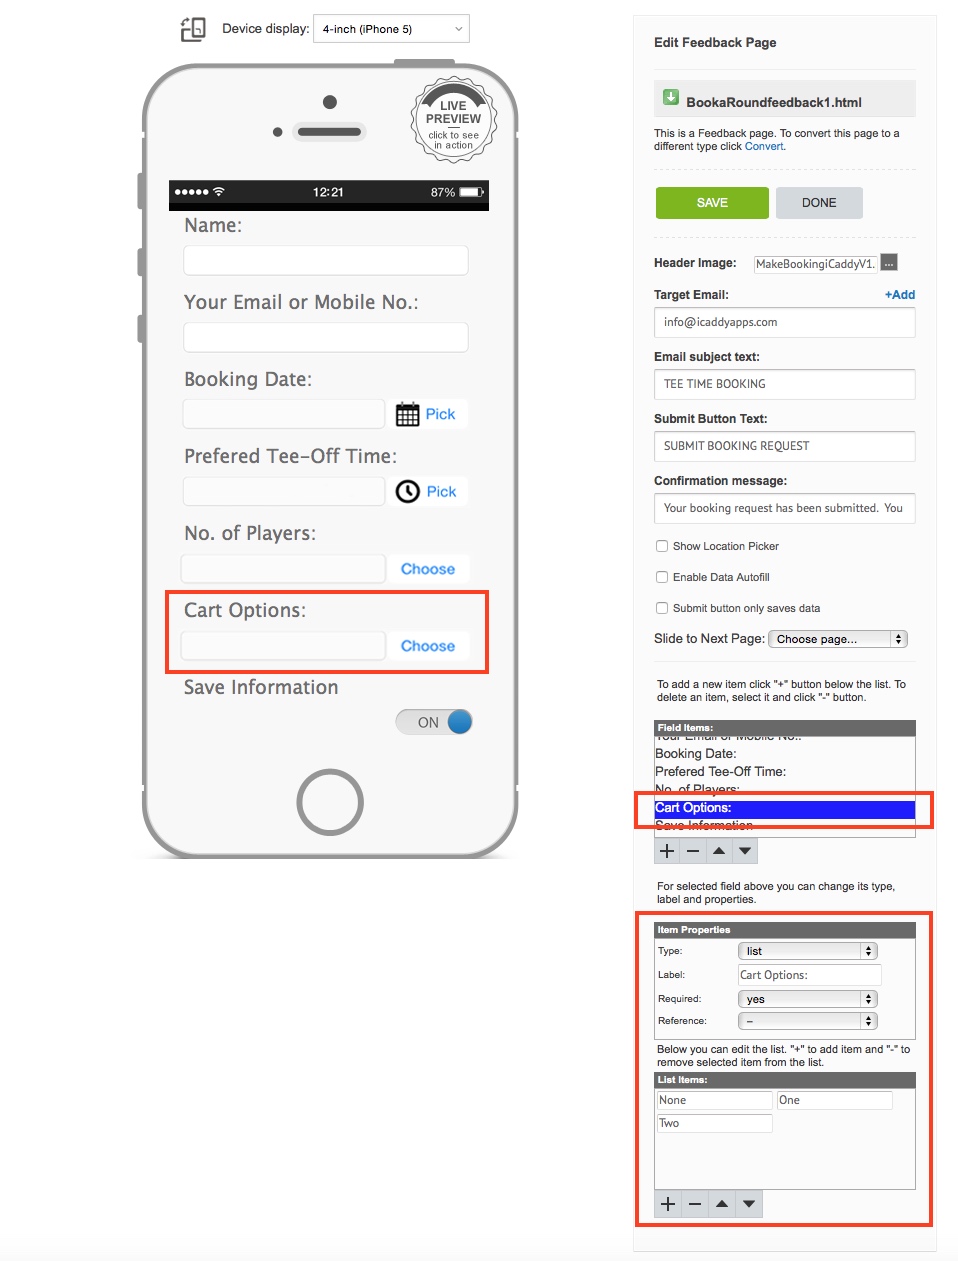
Orange Box: 'Field Items' section. Each 'Field Item' represents a field on the 'Booking Form' (e.g. Cart Options as shown in Step 3 below). Add, delete or change the order of the 'Field Items' on the booking form by using the (+), (-) or arrow buttons (located beneath the 'Field Items' section).
Green Box: The 'Item Properties' section contains the 'Type', 'Label' and 'Required' settings. Each setting is described below.
Type: The 'Type' property defines the
function of the selected 'Field Item'. Field item
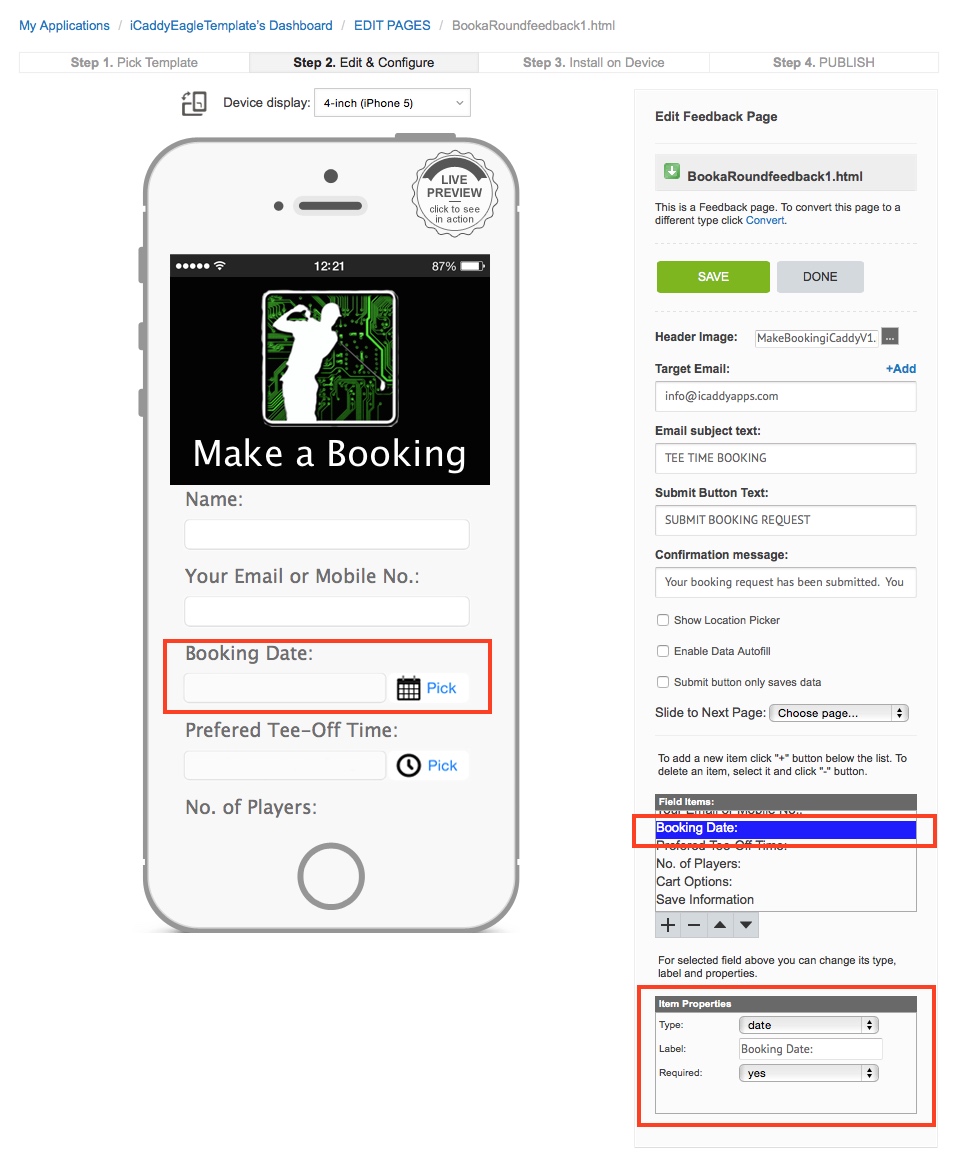
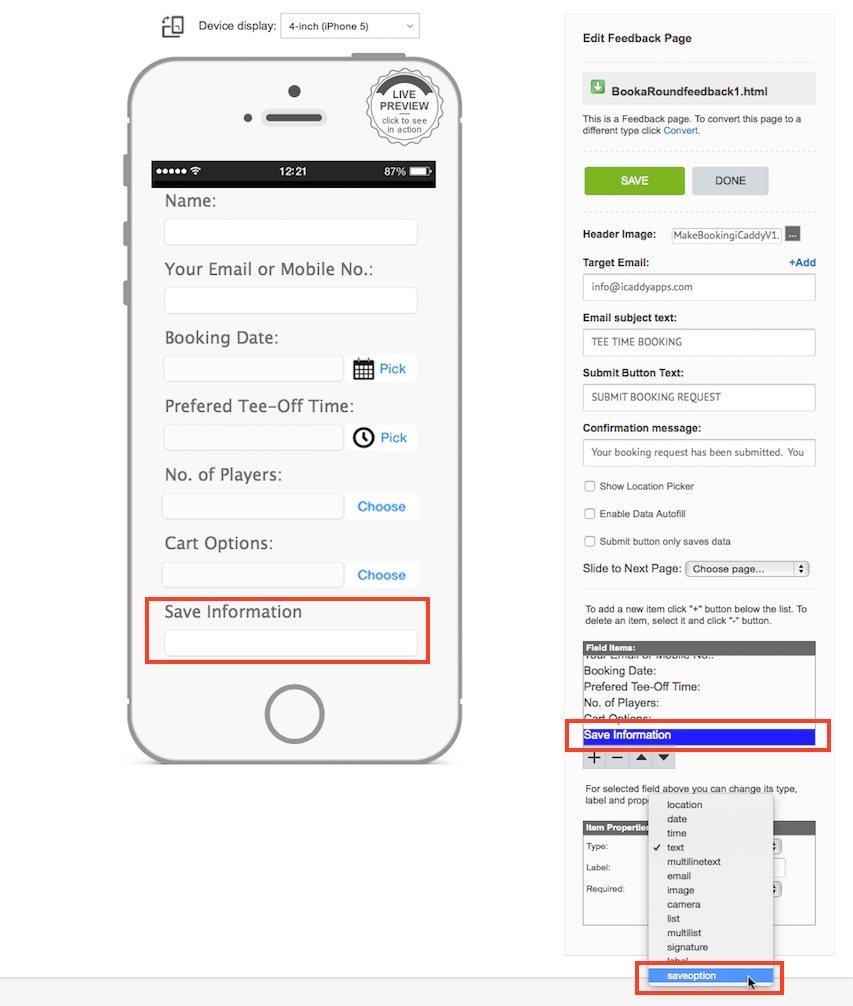
types include date, time, text, multi-line text, email, image, camera, list, multi-list and 'save option'. The 'Save Option' is described further in Step 5 below.
The function of the 'Field Item' is selected via the drop-down menu. Some field types include sub-menus which enable additional editing features. For example, you can define how many options appear in a list (e.g. the number of golf carts required for the booking - none, one or two etc. as shown in Step 3 below).
Note that most field types are
not used in the default 'Booking Forms' provided in iCaddy App templates.
Label: The 'Label' property reflects the text displayed for the corresponding 'Field Item' on the device (e.g. 'Name:').
Required: Select 'Yes' or 'No' for the respective 'Field Item'. Selecting 'Yes' requires the App-user to complete the corresponding field on their device in order to 'Submit' the 'Booking Request' (i.e. the corresponding 'Field Item' becomes mandatory). If a mandatory field is left blank, the user is requested to complete the relevant field(s) before submitting the form. We recommend setting 'Yes' for all 'Field Items'.

