How to Edit 'App Store' Properties & Multimedia

The following tutorial describes how to edit the Apple 'App Store' Properties and 'App Multimedia' images for your App.

This information is applicable to Apps developed for Apple iPhone / iPad devices only.

(Please refer to How to Edit 'Play Store' Properties & Multimedia to edit these settings in Apps developed for Android devices).

Step 1

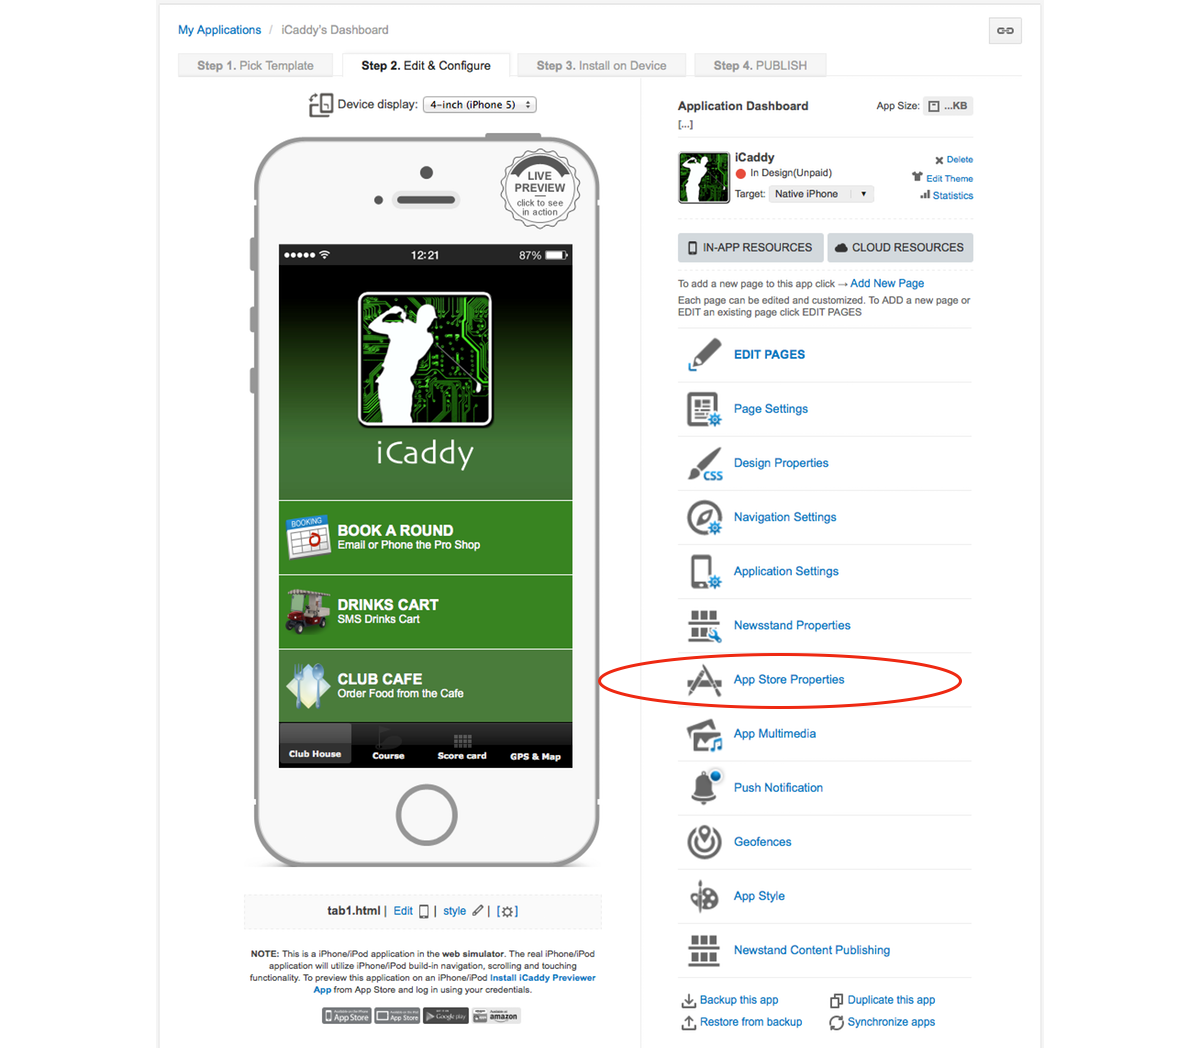
From your App's 'Dashboard', select 'App Store Properties' on the right-hand side.

Step 2

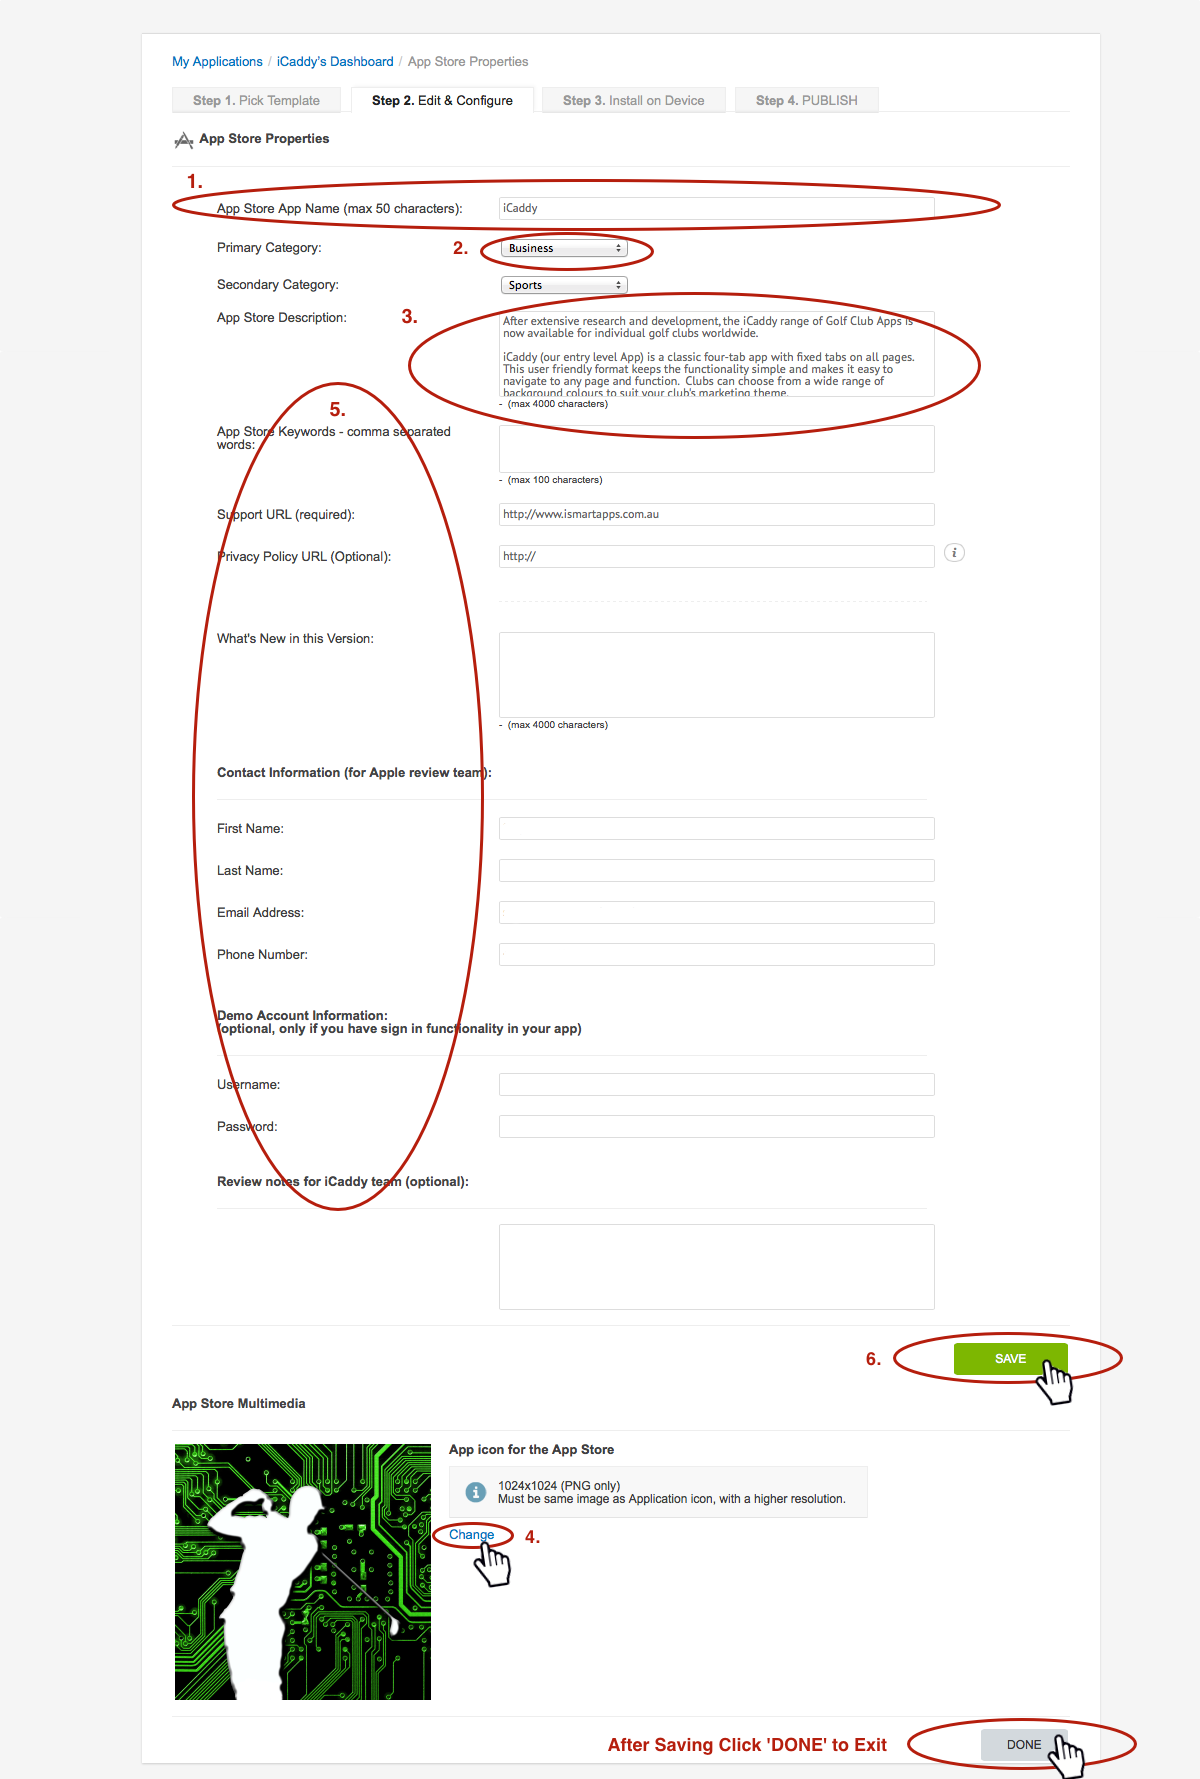
2.1   App Name.  In the 'App Store Properties' screen, insert the Name for your App (e.g. Golden Vale Golf Club) - spaces are allowed.

Note:  This is the name that will be displayed in the Apple 'App Store'.  The name chosen for your App should not be generic - it should be unique to your individual golf club to avoid publishing complications (where another App may already exist under the same name).


2.2  Change 'Primary Category' to 'Sports'.  Note the 'Secondary Category' field is for 'Game' Apps only and is not applicable.  It does not matter what 'Secondary Category' is selected.


2.3  In the 'App Store Description' field, enter a description for your App.  This information will be displayed on the Apple 'App Store' and will also be shown when the App is viewed in the iCaddy Apps Previewer.  This field has a maximum of 4000 characters.  After completing the 'Apps Store Description', do not complete any other fields at this stage.


2.4   App Icon.  Scroll down the page to where 'App icon for the App Store' is indicated.   Click 'Change' to upload (or change) the icon.  Ideally, the icon selected should be the same logo used for your golf club's general marketing purposes, such as the logo featured on your club's website.   Please be aware that smaller sizes of the same image will be used in the 'App Multimedia' section (described below).

Note:  This image must be a 1024 x 1024 pixel .png file only.  Other sizes or image file types will be rejected.

Remember:  Image file names are to contain only numbers, letters and underscores with NO SPACES (e.g. Example_App_Icon_2.png).


2.5  All other fields in the 'App Store Properties' cell should be left blank, unless you intend to publish the App under your own Apple developer account.


2.6  Click 'SAVE' then click 'DONE' to return to the App's 'Dashboard'.  You can click 'SAVE' / 'DONE' at any stage and return to complete later.

Step 3

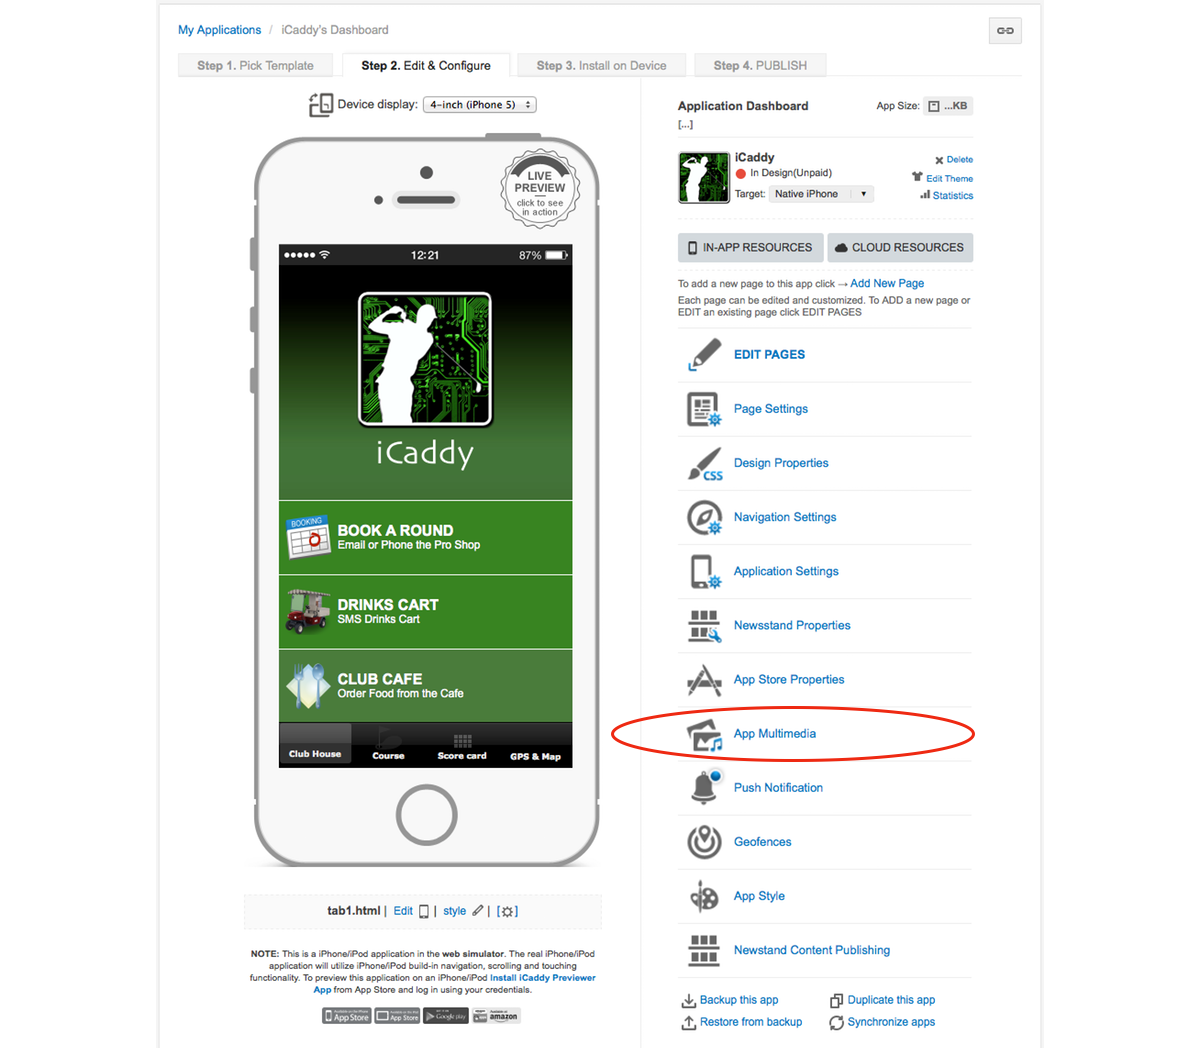
From the App's 'Dashboard', select 'App Multimedia'.

Step 4

Summary:  The different-sized 'Application icons' uploaded in this section are used to display each image on Apple devices with different screen sizes and/or resolution (e.g. iPhone 3 or iPhone5 etc.).


4.1  Application Icons.  In 'App Multimedia' (App Icons), select 'Change' below each 'Application icon' and add a new image as required.  

Note:  Upload image and resize to icon requirments.  The sizes required are indicated for each 'Application icon'.  All icon images must be .PNG ONLY.

Remember:  Image file names are to contain only numbers, letters and underscores with NO SPACES (e.g. Example_App_Icon_2.png).

Design:  We recommend using borderless square images without rounded corners, noting that all 'Application icons' are cut by Apple with a different corner radius for each phone type.  Also, it is important to note that all 'Application icon' images should extend to the edge of the canvas and must not contain a clear background layer (Alpha Channel), as any clear background space will be displayed as solid black (both in the App Store and on Apple devices).

Remember:  Image file names are to contain only numbers, letters and underscores with NO SPACES (e.g. Example_Splash_Screen_Image_3.png).
Step 5

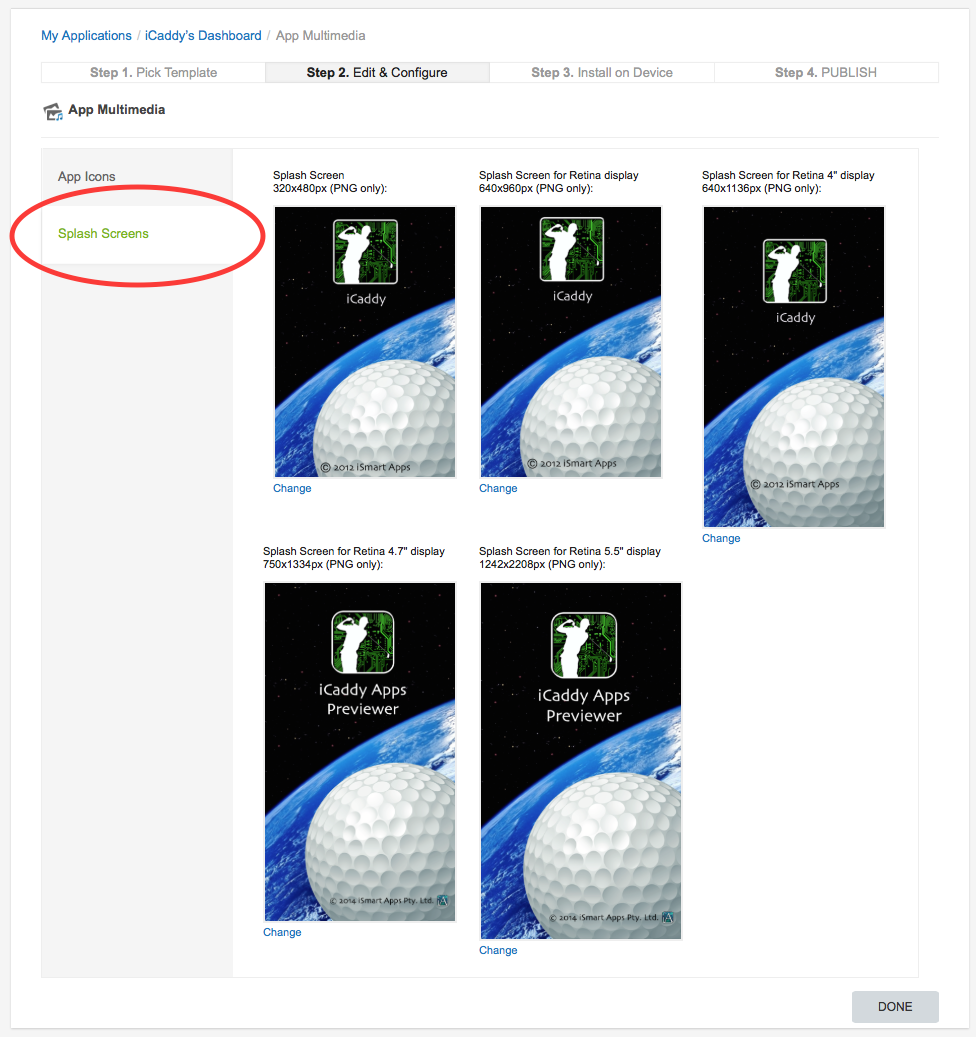
Summary:  The different-sized 'Splash Screens' uploaded in this section are used to display each image on Apple devices with different screen sizes and/or resolution (e.g. iPhone 3 or iPhone5 etc.).


5.1.  Splash Screens.  Click 'Change' below each 'Splash Screen' and add a new image as required.

Note:  Upload image and resize to icon requirments  The sizes required are indicated for each 'Splash Screen'.  All 'Splash Screen' images must be .PNG ONLY.

Remember:  Image file names are to contain only numbers, letters and underscores with NO SPACES (e.g. Example_Splash_Screen_Image_3.png).

Further Info:  A 'Splash Screen' is displayed every time an App is opened on a mobile device.  When an App is initially downloaded and viewed for the first time on the iCaddy Apps Previewer, the 'Splash Screen' remains visible for an extended period of time whilst the App loads.  The 'Splash Screen' may apppear slightly stretched on initial viewing, however it will then be displayed at the correct size each time the App is previewed.


5.2  Click 'DONE' to return to the App's 'Dashboard'.  You can click 'DONE' (to save your work) at any stage while updating 'App Multimedia' and return to complete later.

Congratulations.  After completing this tutorial, you will be familiar with the process for creating, resizing and uploading image files into your App's 'Resources'.  This process forms the basis for building your App in the iCaddy Apps framework.

You are now well on your way to building an App for your club!