How to Select a Template


Step 1

Step 2

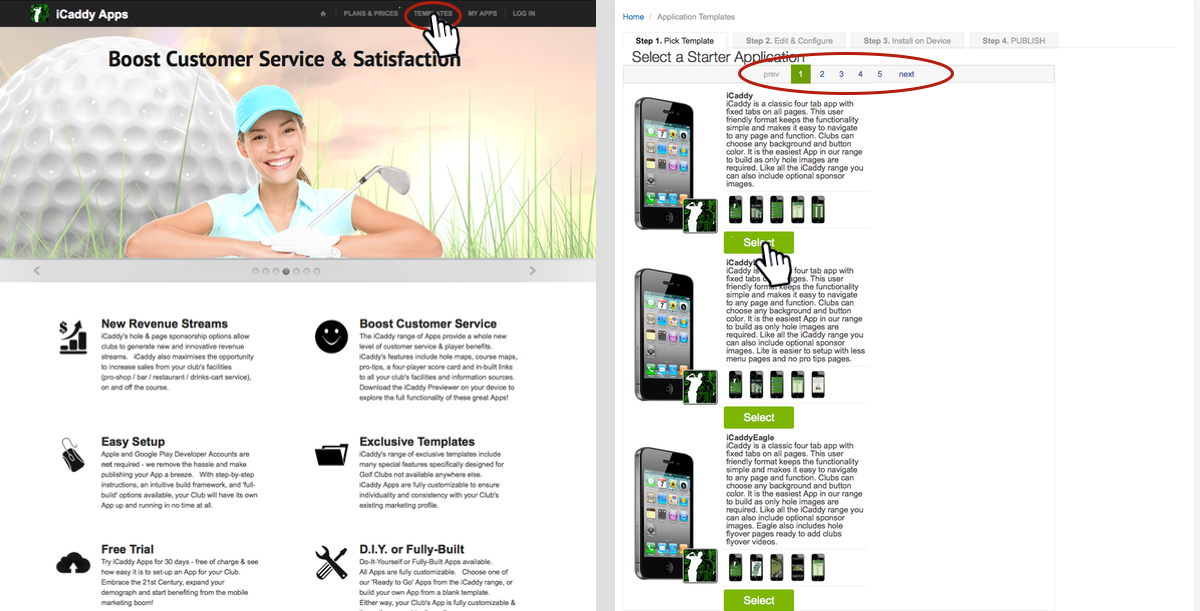
On the 'Home' page, select 'Templates' at the top of the page. Select your chosen App template. You can browse through the various template pages via the page numbers at the top or bottom of the page.

Once you've decided on your preferred template, click 'Select'.


Step 3

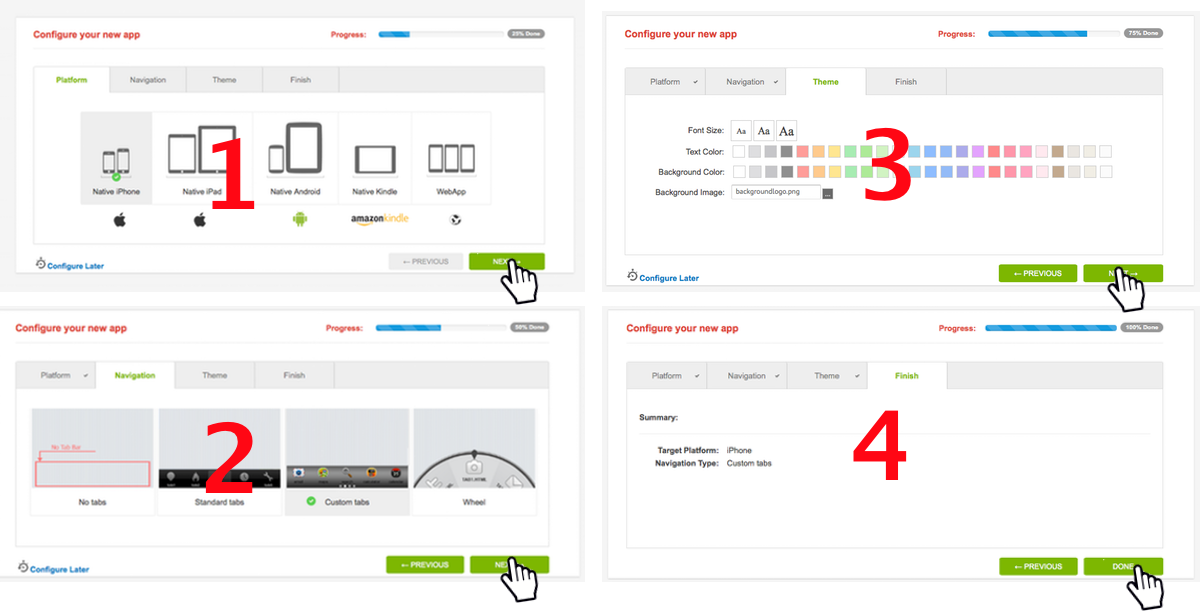
The 'Configure your new app' page will appear.

Step 1 - Platform.  Select 'Native iPhone' (for an iPhone App), or 'Native Android' (for an Android device App) then click 'Next'.

Step 2 - Navigation.  Select 'Custom Tabs' then click 'Next' (You can change the tab type later on if preferred).

Step 3 - Theme.  Click 'Next' (Backgrounds can be changed later).

Step 4 - Finish.  Click 'Done'.


Step 4

Step 5

Select 'Use This Template'. Insert Your Application ID (Numbers and letters only WITH NO SPACES) then select 'Create'.

Note: The Application ID is a discrete identifier (for your App) which is used in the iCaddy Apps system.  You will not be able to change the Application ID once it has been entered.  The Application ID is not the name that will be listed for your App in the App Stores.  Setting up the App Store Name for your App is described in a separate tutorial.


Step 6

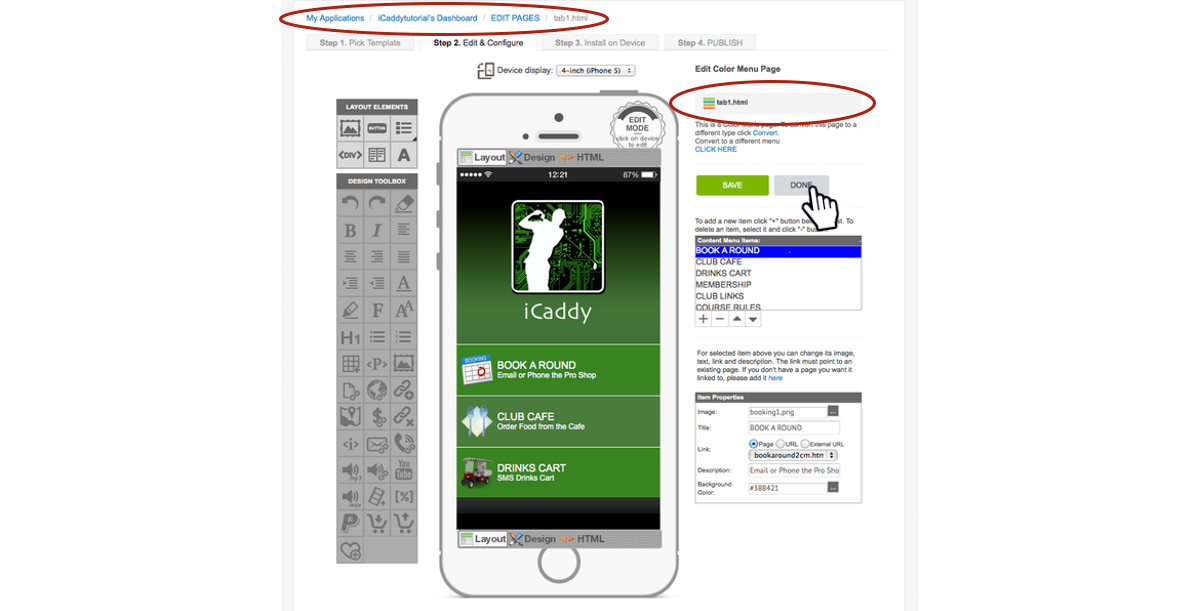
After creating your Application ID, the page shown above will appear (or a similar page depending on which App template you selected in Step 2).  The default page normally displayed is the 'EDIT PAGES' screen for the page titled 'tab1.html'.

At this point, although you are able to edit the content associated with the first 'Tab' of your App ('tab1.html'), rather than getting straight into editing the App, we recommend you reverse up the 'Navigation Path' one level.  Note that the 'Navigation Path' is indicated at the top left of the page (e.g. My Applications / Xx's Dashboard / EDIT PAGES / tab1.html).

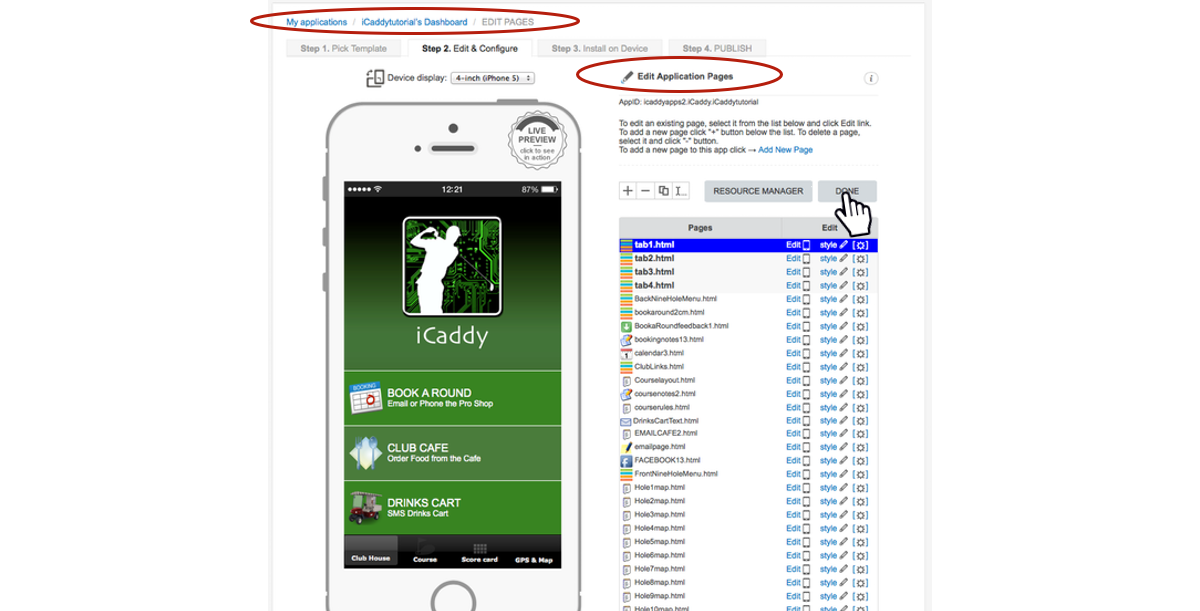
Click 'DONE'.  You will then be directed to the 'Edit Application Pages' screen.  This screen is also known as the 'EDIT PAGES' screen for your App.


Step 7

In the 'Edit Application Pages' screen, Select 'Done'.


Step 8

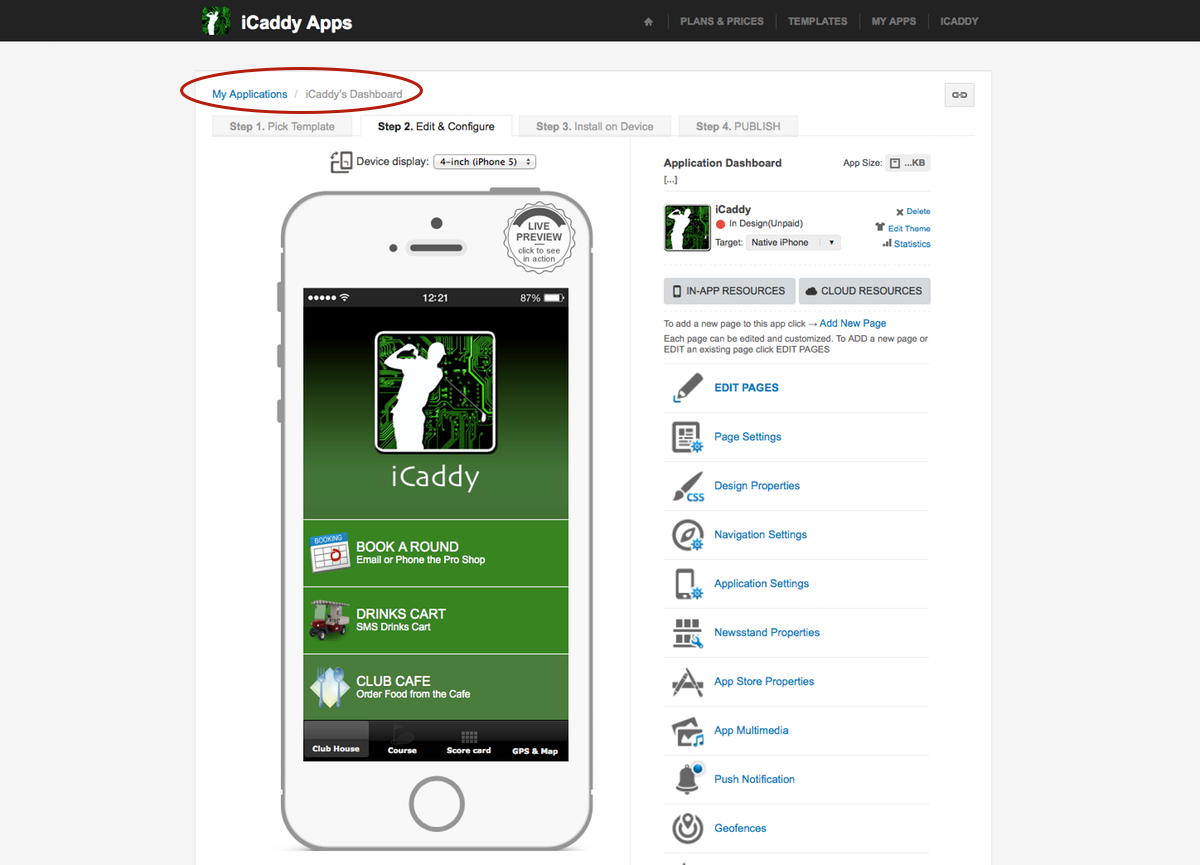
You are now at the 'Dashboard' for your particular App.   Each App you build has its own Dashboard.   From here you ready to start editing your App.  You can select any of the options listed down the right hand side of the page to edit your App as required.  Each option is described in a separate tutorial which we recommend you refer to, before proceeding.

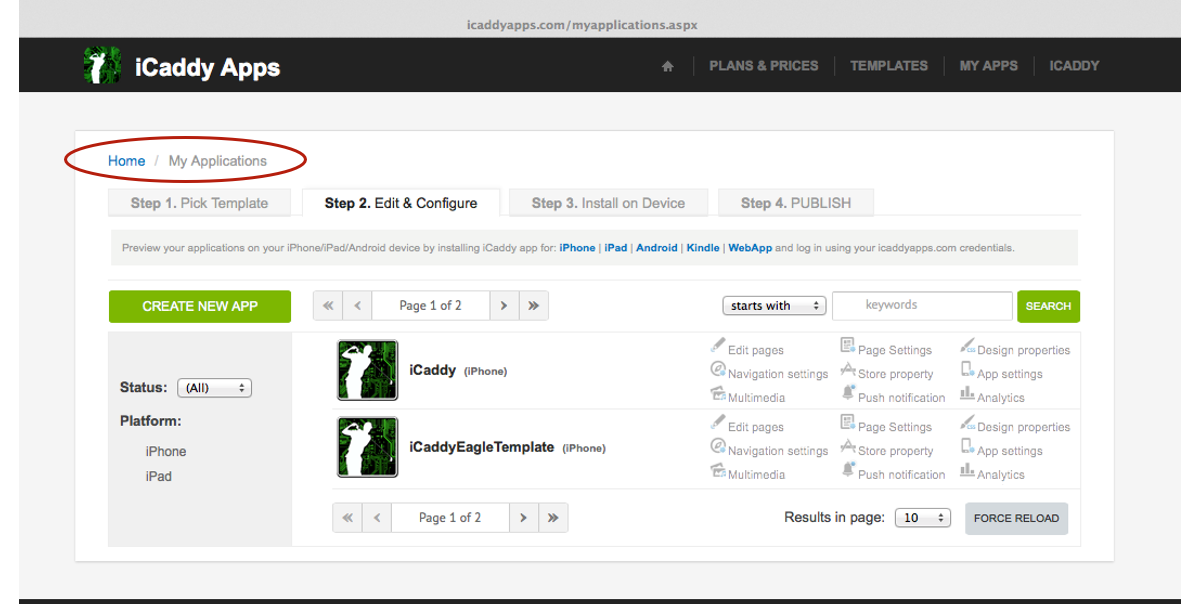
Click 'My Applications' (in the 'Navigation Path') or click 'MY APPS' (at the top of the page) to return to the 'My Applications' list.   Any and all Apps you build will be listed here (see image in Step 9 below).


Step 9

You are now at the 'My Applications' list.  Click 'Home', or select your App from the list to return to the App's 'Dashboard' to start editing.